Sunday, March 13, 2011

Day 2 of engine swap

34. Received feedback from the Toyota Nation crew that the drivers side axle is removed by prying on it with enough force to overcome a snap clip on the axle. We bolted the cover plate back on and gave it a few yanks with the pry bar and it finally popped out.


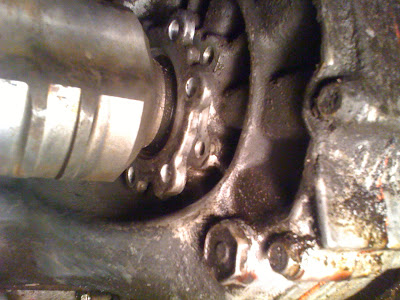
35. Removed center bolt on the rear mount (round). Also removed the two bolts attaching the flange to the block from the rectangular rubber mount (not pictured), then dropped the center frame member (greasy piece of metal running left to right in the photo).


36. Went topside and we removed the starter.


37. Began lifting on the motor with the engine picker. It kept hanging up on something in back though and my 14 year old finally spotted the culprit...had forgotten to remove the power steering pump on the rear, passenger side of the block (not pictured). Once we removed the mounting bolts for the pump, the engine/tranny moved freely. We hung it with the block end slightly higher since the end of the tranny needed to clear the engine mount bracket which cannot be removed. Taking care to push the various hoses and wiring harness out of the way, the engine lifted out easily. Success!!


38.  Placed the unit on blocks and began to remove the bolts attaching the engine block to the tranny. There were multiple sizes of bolts to be removed, 17mm, 14mm and 12mm, keeping track of which went where. Once all were removed, used a flat bladed screwdriver to split the seam. Keeping the block hanging from the picker, we pushed the block away and it separated easily.


39. Removed the clutch assembly. Remembered from the old days removing the clutch in the bug (in the college dorm parking lot no less!) to back out the bolts evenly to relieve compression on the clutch spring.


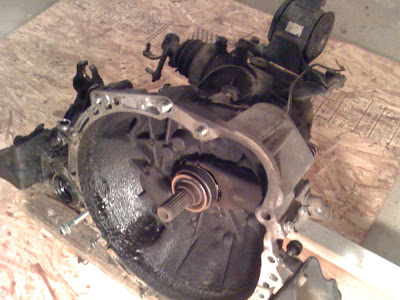
40. Removed the flywheel. Definitely could see evidence of a leaking crank seal, both behind the flywheel and on the tranny bell housing. Spent a few hours this afternoon with a scraper removing the thick gooey sludge from the bell housing/transmission. Will take it down to the car wash to soak it in degreaser.


41.  The JDM short block showed up last week at a friends shop that had a dock height door. Will be picking it up later next week and begin the component swap process. We need to decide what to replace and what to re-use from the old engine. So far am thinking:

  • New front and rear motor mounts
  • Clutch disk & throw out bearing
  • Timing belt & water pump
  • Crank seals (both sides)
Not sure about the axle seals...didn't see evidence of leaking but probably wouldn't hurt. Any other items I'm missing? (Keeping in mind I already have the full set of gaskets from when this was just a head gasket job...).


Monday, March 7, 2011

Day 1 of engine swap

27. Now that we are resolved to replace the engine with a short block, started removing components to get the motor and transaxle out of car. First step was removing the radiator. Pretty easy...disconnected the hose at the bottom and removed the two bolts at the top.


28. Removed the three bolts attaching the AC compressor to the block. Hog tied it to the front of the car to keep it out of the way when we lift the block out.


29. Removed the clutch slave cylinder. In spite of warnings to not disconnect the line with the fluid, I accidentally stepped on the clutch pedal tonight and it shot the piston right out of the cylinder, pissing brake fluid all over the garage floor. The fluid looked dark and contaminated, probably needing to be flushed anyway so I'm convincing myself it was a blessing in disguise...


30. Removed the transmission linkage cables. There was so much crap built up on the housing that I couldn't tell how to remove the cables. Finally figured out the angled flanges at the top of where the cable mounted on the housing were actually clips that pulled out. Was able to pull them free with a couple of good yanks.


31. Now we had to dive under the car to remove the axles from the transmission. Drained the transmission fluid and then sent my 14 year old under the car to remove the bolts from the driver side axle. The lower bolts were easy to access with a box end wrench however had a tougher time with the upper bolts. Realized there was a shield in the 10 o'clock position that we removed and gave us access to the other two bolts.


32. The tech manual instructions showed removing the knuckle mounting bolts from the driver side wheel assembly to be able to swing the assembly outboard, giving space to pull the axle out of the transmission. Not even...wouldn't budge. Gave up on the driver side for awhile and we attacked the passenger side axle. Removed the large e-clip and the bolt retaining the bearing as well as the mounting bolts holding the bearing housing to the block. Removed the knuckle mounting bolts on the passenger side wheel assembly and swung it outward which gave us room to pull the axle from the transmission. It pulled out from the spline gear just fine.


33. Okay, back to the driver side. Was able to get the outer cover backed out a bit but couldn't get it to budge any further. Will have to show this to the Toyota Nation forum to ask what they think.